Using AirPort Utility to collect RSSI
Apple developed a utility to manage your Wi-Fi network and assist connecting to Airport base stations. It is NOT installed by default in iOS and there are some settings that may need tweaking each time you want to run the application.
The AirPort Utility has several features, but the ones I’m really interested in are:
- View Wi-FI signal information
- Share Wi-FI signal information
- Runs on iOS
Instructions for getting this utility up and running are detailed below.
Enabling AirPort Utility
First, download the AirPort Utility application from the Apple App store. Click on this link or search for it in the App Store: Airport Utility.
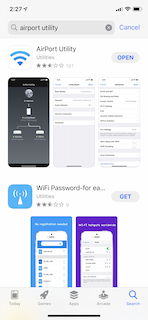
Before the app can be used for W-Fi scanning purposes, the scanning function needs to be enabled. It is useful to disable the app each time you finish with it as it consumes unnecessary battery life while running in the background.
Enable the scanning function within Settings. Scroll down to the app specific configuration section, until you find “AirPort Utility”.
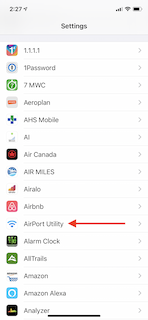
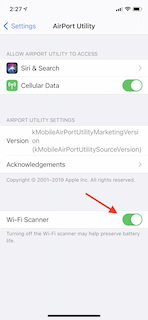
Tap on the “AirPort Utility” and enable the “Wi-Fi Scanner” feature as shown below.
Now launch the “Airport Utility” application.
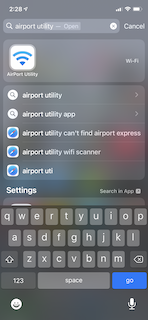
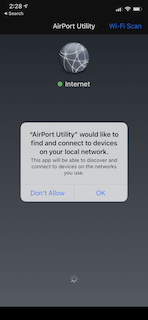
Once launched, tap “Wi-Fi Scan” to begin the scanning process. An option to grant permission for your iOS device to connect to other devices on your local network may appear – choose wisely. Note, if scanning was not enabled under “Settings”, the “Wi-Fi Scan” option will not appear.
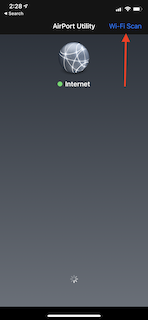
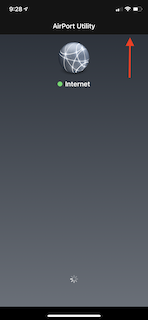
Tap “Scan” again in the upper right corner (again – because it’s Apple and you really mean in it).
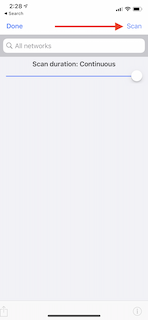
The next screen will appear blank for a few brief moments as the scanning process initiates.
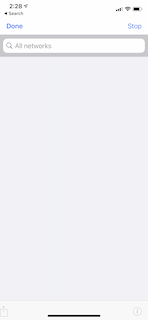
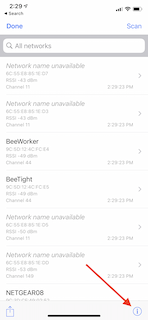
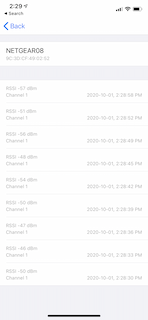
After waiting a few moments, tap a specific SSID to see a historical record of samples collected since the scanning process began.
Additional Useful Features
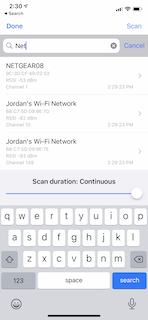
You can filter SSIDs by typing the name in the search field. This is handy if there are many SSIDs in your local environment and the one you are interested in keeps flashing off the screen.
After stopping the scan, data can be exported via email, notes, SMS, etc. by tapping on the export button in the lower left corner of the screen.
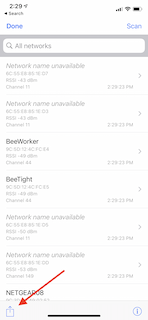
An example of exported data is shown below:
“SHAW-9C79B0-5G”, “66:77:7D:9C:79:B0”, “-92”, “44”, “9:28:47 PM”

“SHAW-9C79B0-5G”, “66:77:7D:9C:79:B0”, “-92”, “44”, “9:28:47 PM”

“SHAW-9C79B0-5G”, “66:77:7D:9C:79:B0”, “-90”, “44”, “9:28:50 PM”

“SHAW-9C79B0-5G”, “66:77:7D:9C:79:B0”, “-90”, “44”, “9:28:53 PM”

“SHAW-9C79B0-5G”, “66:77:7D:9C:79:B0”, “-93”, “44”, “9:28:57 PM”

“SHAW-9C79B0-5G”, “66:77:7D:9C:79:B0”, “-89”, “44”, “9:29:00 PM”

“NETGEAR08”, “9C:3D:CF:49:02:52”, “-61”, “1”, “9:28:44 PM”

“NETGEAR08”, “9C:3D:CF:49:02:52”, “-64”, “1”, “9:28:47 PM”

“NETGEAR08”, “9C:3D:CF:49:02:52”, “-53”, “1”, “9:28:50 PM”

“NETGEAR08”, “9C:3D:CF:49:02:52”, “-52”, “1”, “9:28:53 PM”

“NETGEAR08”, “9C:3D:CF:49:02:52”, “-64”, “1”, “9:28:57 PM”

“NETGEAR08”, “9C:3D:CF:49:02:52”, “-59”, “1”, “9:29:00 PM”
Finally, you can also look at Channel Usage or the number of devices operating on each channel by tapping on the Information button in the lower right hand corner.

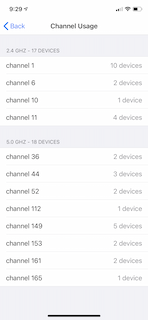
As a last step, remember to disable the scanning function in your Settings to avoid unnecessary battery drain.

As a parting note, it is worth mentioning the Apple Wi-Fi Performance Diagnostics available on iOS and iPadOS devices. Enabling these diagnostics offers significant data points on the behaviours of your Apple devices. More details can be found on @wirelessguru’s blog found here.
Unfortunately, the profile needs to be installed every 5 days. To simplify the installation of the profile required to collect performance diagnostic data, you can install a Siri shortcut to install the iOS WiFi debug profile. A blog from @UKDanJones details how to accomplish this here. Note: iOS requires you to trust the installation of 3rdparty shortcuts. Before you can trust a 3rd party shortcut, you must first run a trusted shortcut on your device.
Stay mobile my friends!
Slàinte!
