Extreme Packet Capture
With some of the new features coming down the pipe with WiFi6, affectionately known as “11ax”, it may prove a little more challenging to capture all the frames. This blog describes the process to capture WiFi6 traffic using WiFi6 radio interface(s) of an Extreme (formerly Aerohive) access point.

It’s often thought that it’s best to position the packet capturing devices as close to the client as possible. Sometimes any packet capture is better than no packet capture, as long as you understand what is being collected and more importantly, what is missing. For example, if the capturing device is located closer to the AP, you are capturing from a different RF environment; the frames captured as successful vs failed may be significantly different from what the client, far from the AP, experiences. In addition, be mindful that frames can be injected into the airwaves by rogue devices, adding frames to your capture that were not actually transmitted by the devices you care about.
Capturing from an interface on the AP, may allow you to capture OFDMA or MU-MIMO frames; they might otherwise be missed due to WiFi6 client behavior that could disregard resource unit’s (RU) not intended for the receiver.
We move onto the steps necessary to setup a remote packet capture using an Extreme AP650. The AP650 is an enterprise-grade 4×4:4, 802.11ax access point. The steps described below were configured and validated on an Extreme AP650 running v10.0r8.
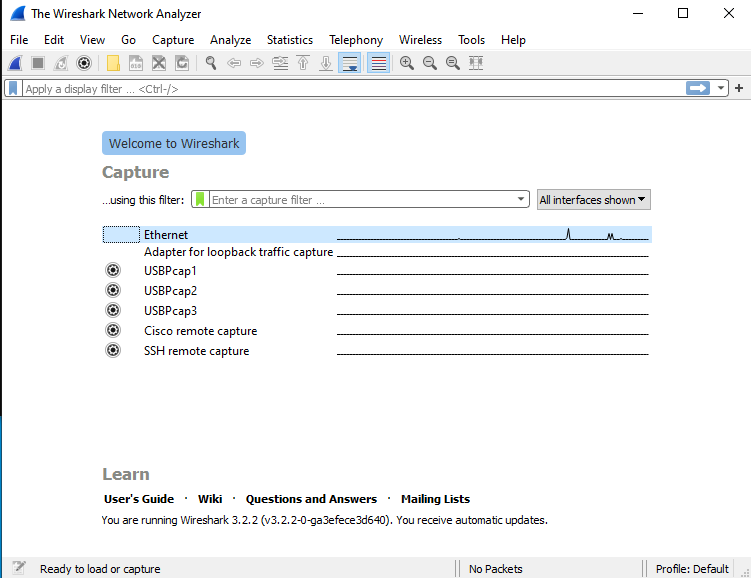
First, the remote packet capture feature is supported in Wireshark for Windows and NOT in Wireshark for macOS (as of v3.2.3), therefore use Wireshark on Windows to perform the steps below.
Second, some commands need to be entered on the AP via CLI. It is possible to enable packet capture via the cloud interface if you have upgraded to ExtremeCloudIQ Pilot (Manage > Tools > Packet Capture).
- Define the IP address of the remote sniffer (host where you are running Wireshark).
- Default listening port is 2002
- Enable promiscuous mode.
- Optionally configure a username & password for the remote sniffer.
- Confirm settings have been configured as expected.
exec capture remote-sniffer host-allowed 192.168.40.14

exec capture remote-sniffer promiscuous

exec capture remote-sniffer user wifivitae wifivitae

show capture remote-sniffer- In Wireshark (Windows), setup up remote packet capture after launching Wireshark.1.
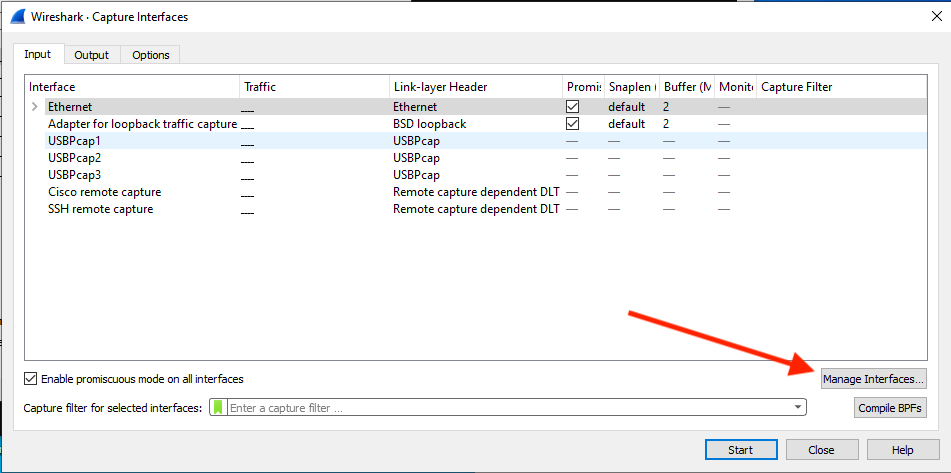
2. Click Capture -> Options.

3. Click the “Manage Interfaces” button on the lower right.
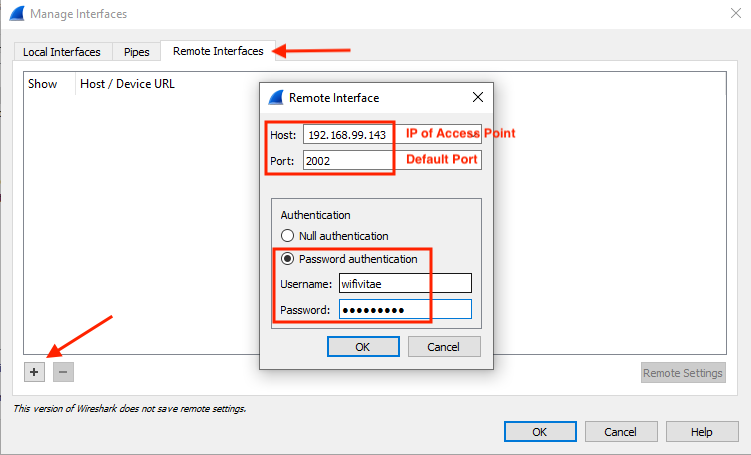
4. Select the “Remote Interfaces” tab.
5. Click the “+” button to add remote interface(s).
6. Enter the required information
- Host: 192.168.99.143 (this is the access point)
- Port: 2002 (default)
- Select Null if no username/password
- Select Authentication and enter username/password entered via CLI.
7. Click on “OK” twice to return to the main interface screen.
8. Select the radio interface(s). You can select both WiFi0 and WiFi1 at the same time to capture on both interfaces.
9. Click on the “Start” button to begin the capture.
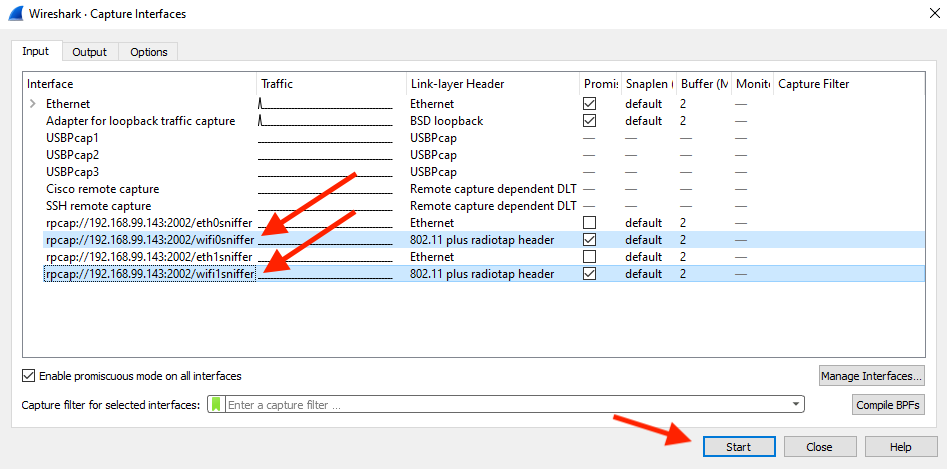
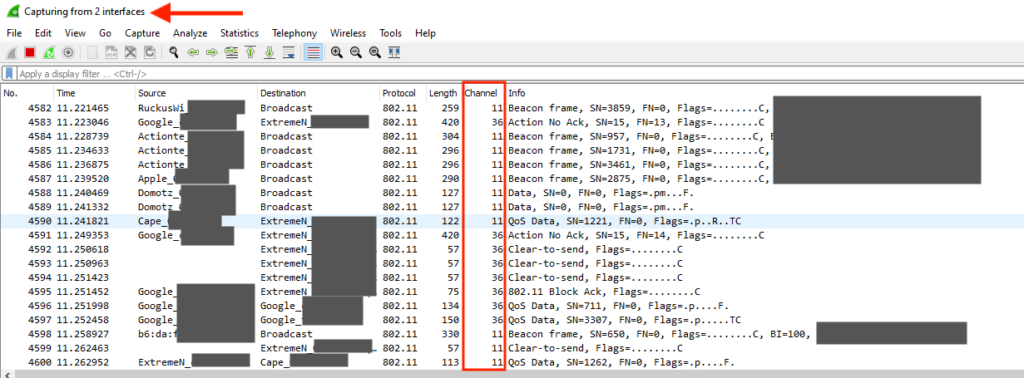
The screen below shows capture from both WiFi0 and WiFi1 at the same time.
It should be noted there are additional capture commands supported allowing you to configure captures for specific interfaces along with options to save the file to a TFTP server. However, I prefer the method described above to capture the frames in real-time. Using the capture command, up to 63 layer 2 or 3 filters can be created to limit the size of the PCAP.
capture interface filter <number>

! promiscuous mode is disabled by default

capture interface promiscuous

! Enter a local file name or the remote location, path, and file name (Format: filename or tftp://server:/path/filename; Default: wifix.cap)

capture save interface wifi<0|1> <string>

show filter 1

filter 1 | l2 subtype 0x8 | l3 dst-ip 0.0.0.0 | direction bidirectional
Slàinte!
References:
CLI commands: http://docs.aerohive.com/330000/docs/help/english/ng/Content/reference/docs/cli-reference-guides.htm