LoRaWAN Mapper – using WisToolBox (iOS)
This blog is part 3 of a 4-part series on LoRaWAN field mappers. For related information checkout the following posts:
LoRaWAN Mapper – using WisToolBox (iOS)
LoRaWAN Mapper – using Helium Console
Configuring RAL10701-P using WisToolBox
WisToolBox is a software tool for configuration and management of RUI3-based RAK modules. It supports different operating systems – Windows, Linux, macOS, Android, and iOS.
As this blog will focus on using iOS, you will want to download it from the iOS specific link below. Note, the app is supported on the iPad, however it is scaled for the iPhone screen size. You can find installers for major OSes at the links below:
- Windows Store
- Linux Snapcraft
- MAC App Store
- iOS App Store
For direct downloads of installers:
To use the WisToolBox Mobile app, make sure you enable Bluetooth on your iOS devices and have a RAK device that has a Bluetooth Low Energy (BLE) interface, such as the RAK10701.
Before proceeding it is useful to have already generated the following values from the application server. See Part 4: LoRaWAN Mapper – using Helium Console for more details.
- DeviceEUI: 6081F9032B6B2010 (8-byte value)
- AppEUI: D727C7710513EFF61E52596A557C7416 (16-byte value)
- AppKey: 6081F96DCB7CE89A (8-byte value)
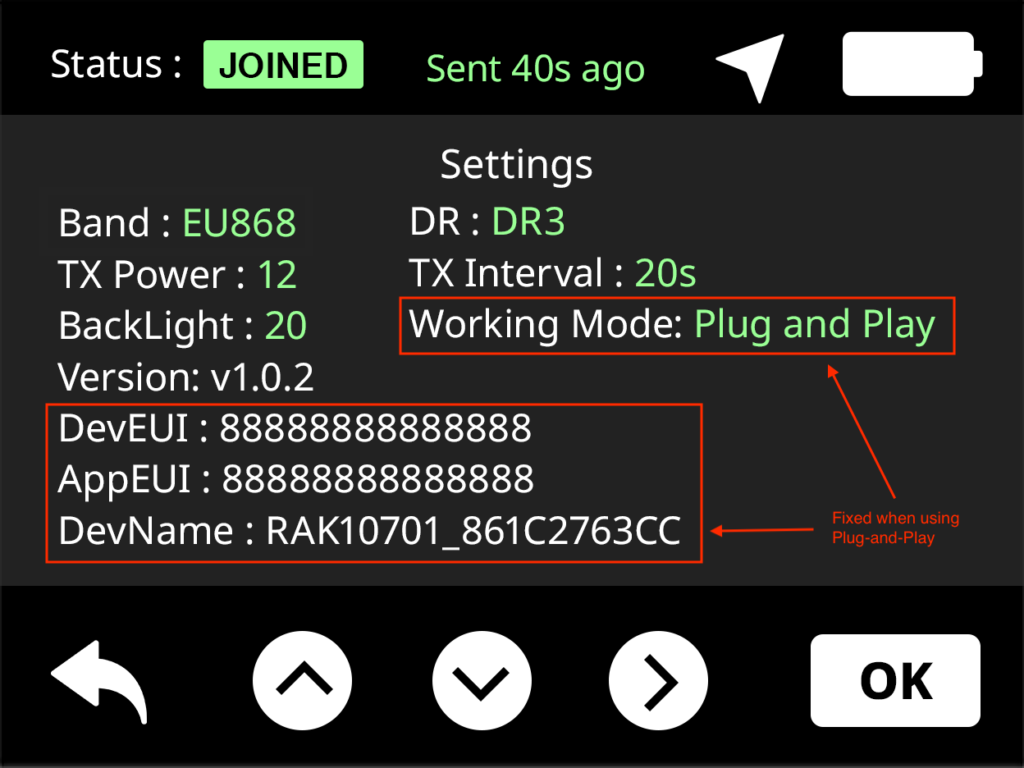
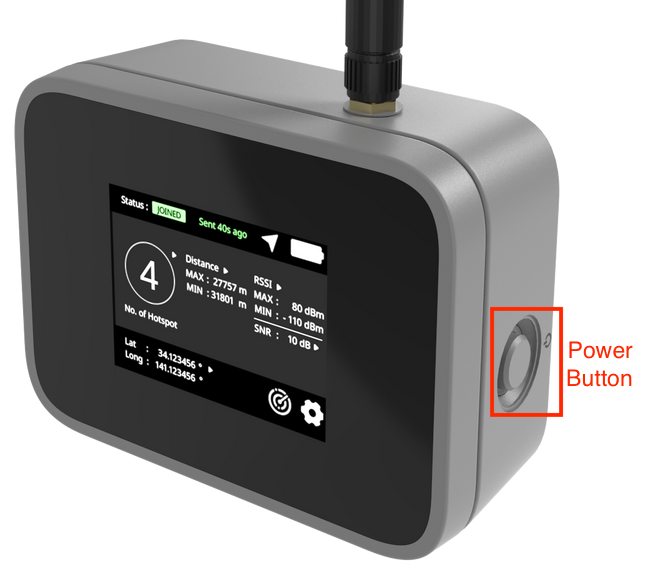
The parameters (except the AppKey) actively used by the RAK10701-H are displayed on the setting menu, highlighted in the image below:
The following instructions are based on the RAK Documentation for the WisToolBox for Mobile; however some of the layouts differed from the documentation and the changes are reflected below.
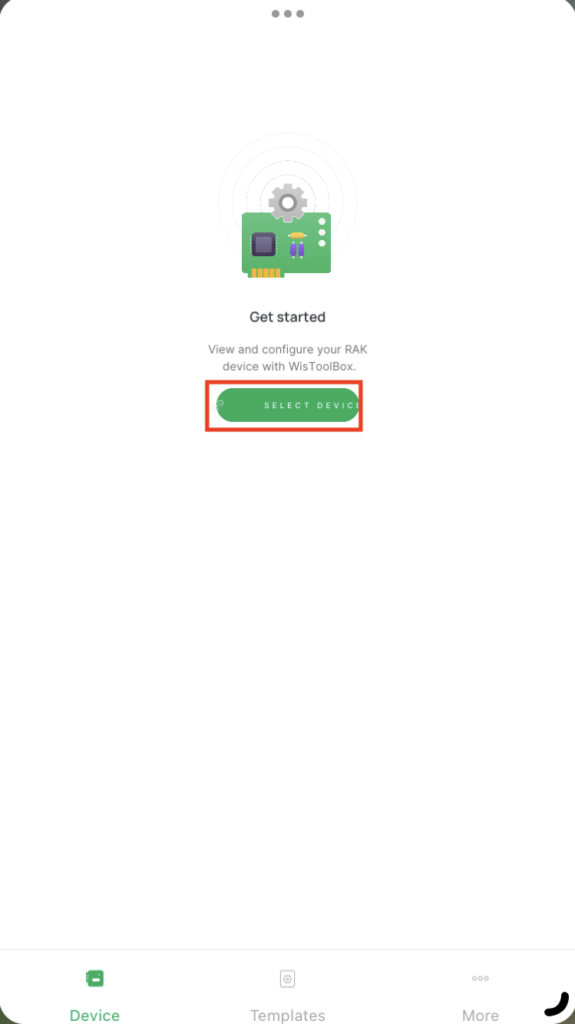
Once installed on your iOS device, open the WisToolBox Mobile app:
1) Power up your RAK device then launch the WisToolBox application on your mobile.
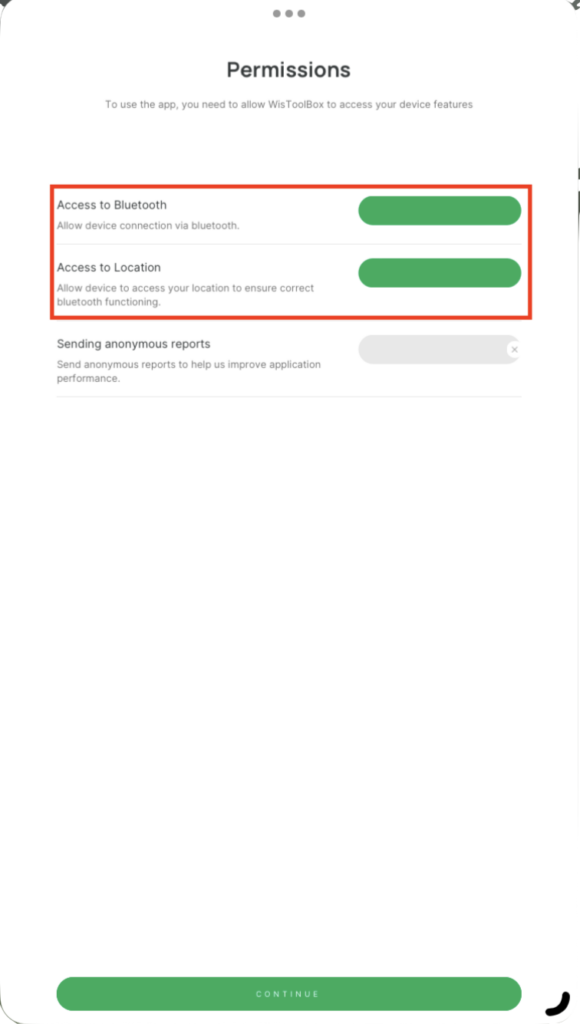
2) If launching for the first time:
- Allow WisToolBox to use Bluetooth and location services on your mobile.
- Agree to the WisToolBox Terms and Conditions
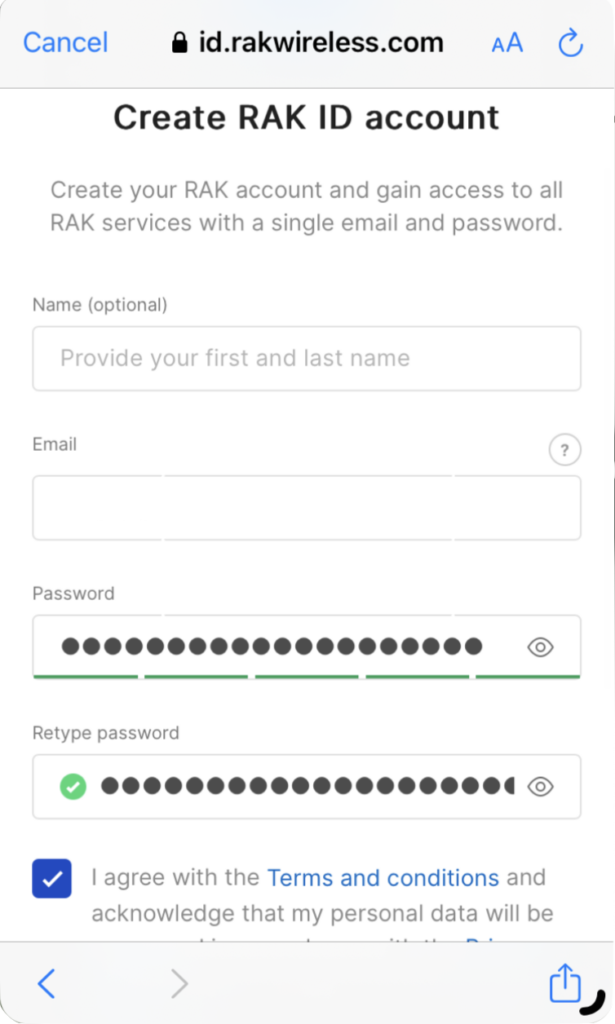
3) If using a RAKWireless for the first time:
- Create a RAK ID account for RAKWireless.
4) Press the power button on the RAK device and click on the CONNECT DEVICE button.
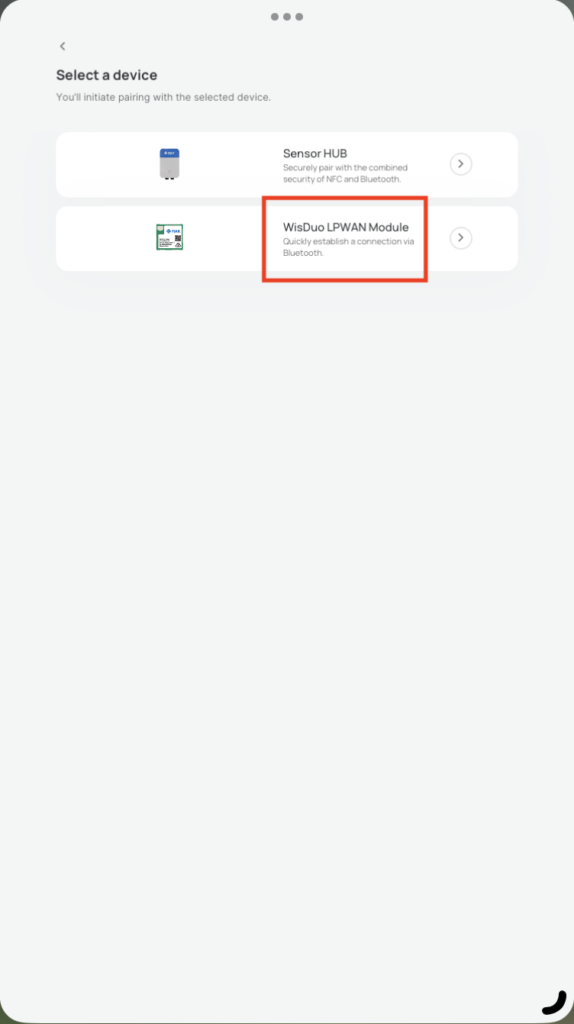
5) Press the ALLOW button to turn on and allow use of Bluetooth. Press ‘Select Device’. Next choose ‘WisDuoLPWANModule’. Finally, press connect. This will start the scan. Look for a Bluetooth Device named RAK.XXXXXX in the scan list.
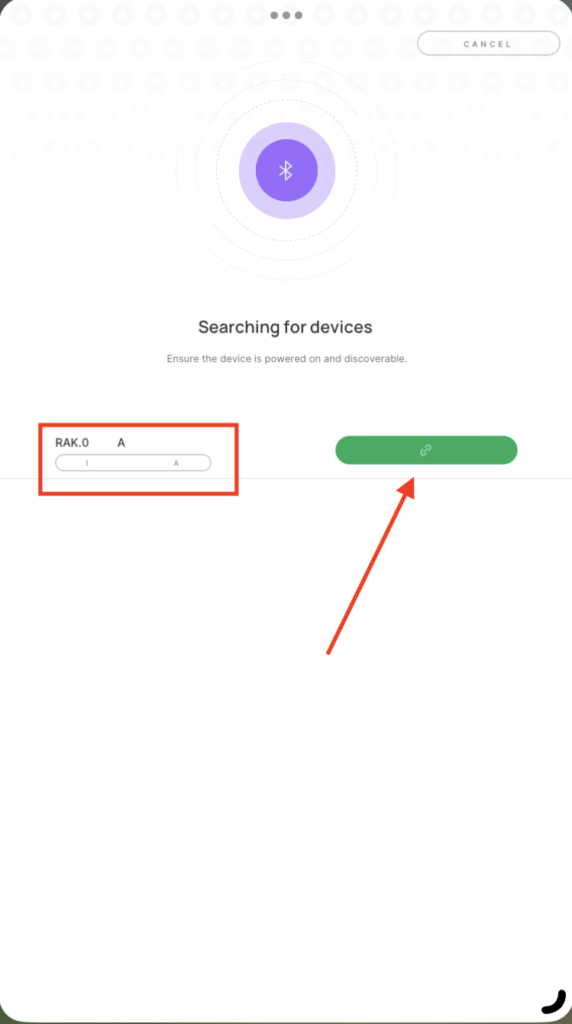
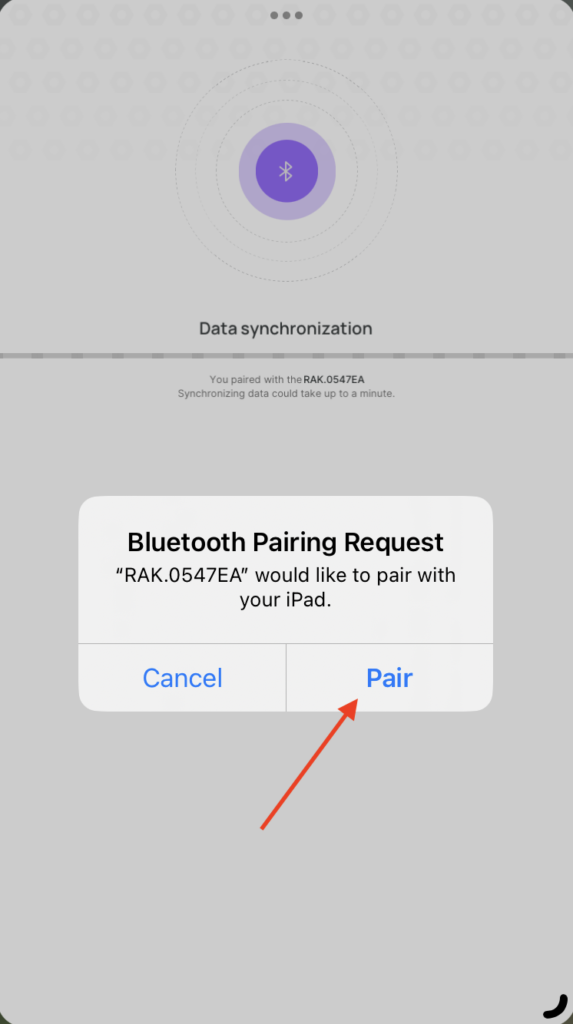
6) When the RAK device is found, connect and pair the device by clicking the green link button. Next, select Pair. Then wait for Data synchronization.
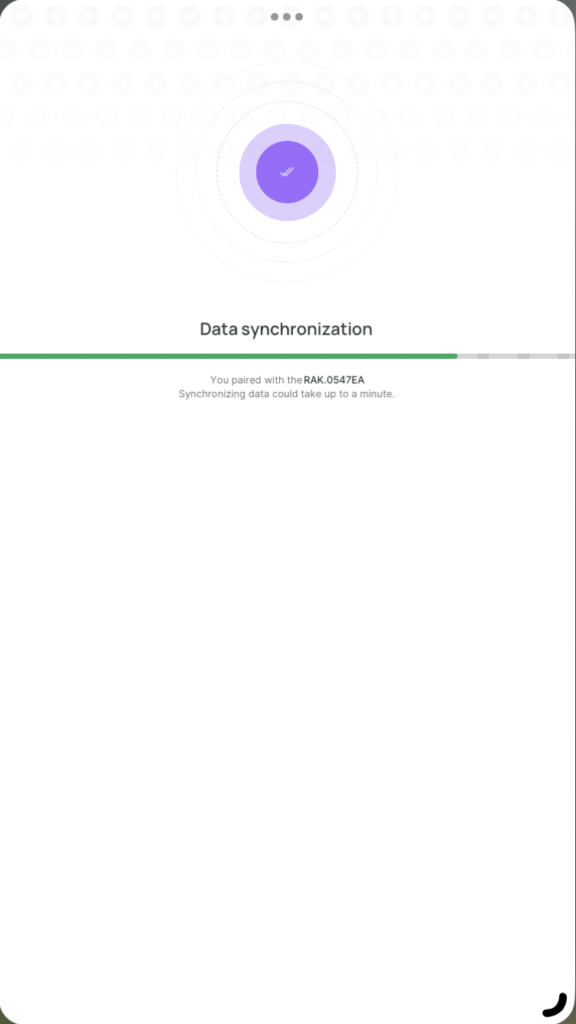
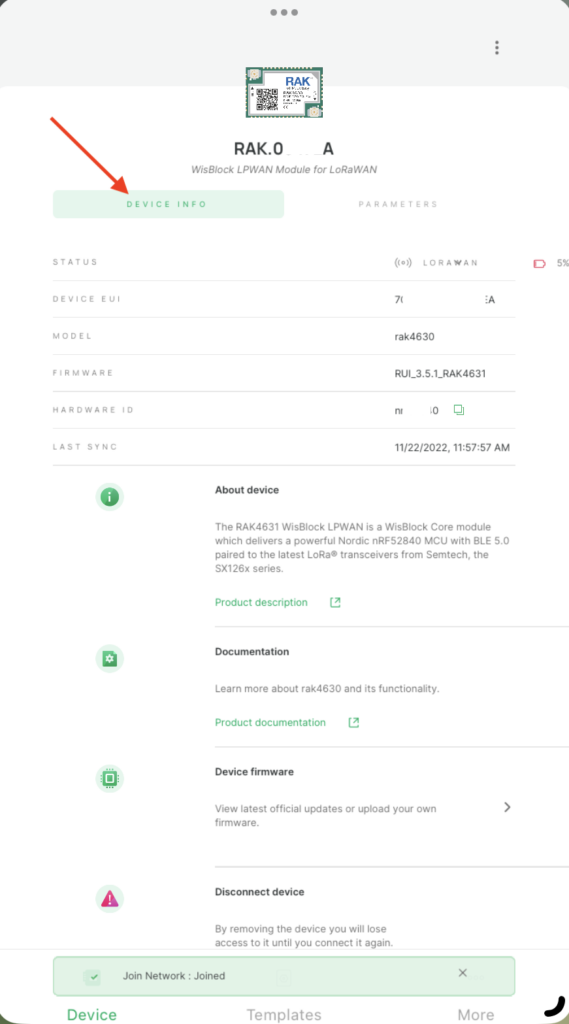
7) When the Data synchronization is complete, you will see the DEVICE INFO screen.
Configuring Parameters
- Click on the parameters tab.
- Expand Global settings.
Verify the following:
- Network Mode: LoRaWAN
- Join Mode: OTAA (Over the Air Authentication)
- Active Region: US915 (see table below)

3) Expand LoRaWAN keys, ID, EUI
Enter the following parameters, which must match values configured in the application server (Helium Console, TTN, Chirp, etc). You can create them here first or in the respective application server, but they must match and can be edited later to achieve this.
- Application EUI: (8-bytes) – e.g. 6081F96DCB7CE89A
- Application Key: (16-bytes) – e.g. D727C7710513EFF61E52596A557C7416
- Device EUI: (8-bytes) – e.g. 6081F9032B6B2010
This is all that is required to be configured. Other parameters are optional and can be configured if you decide to tune your LoRaWAN mapper integration later.
Device Name
1) Click on the ellipses in the top right corner of the screen.
2) Select “Set Device Name”.
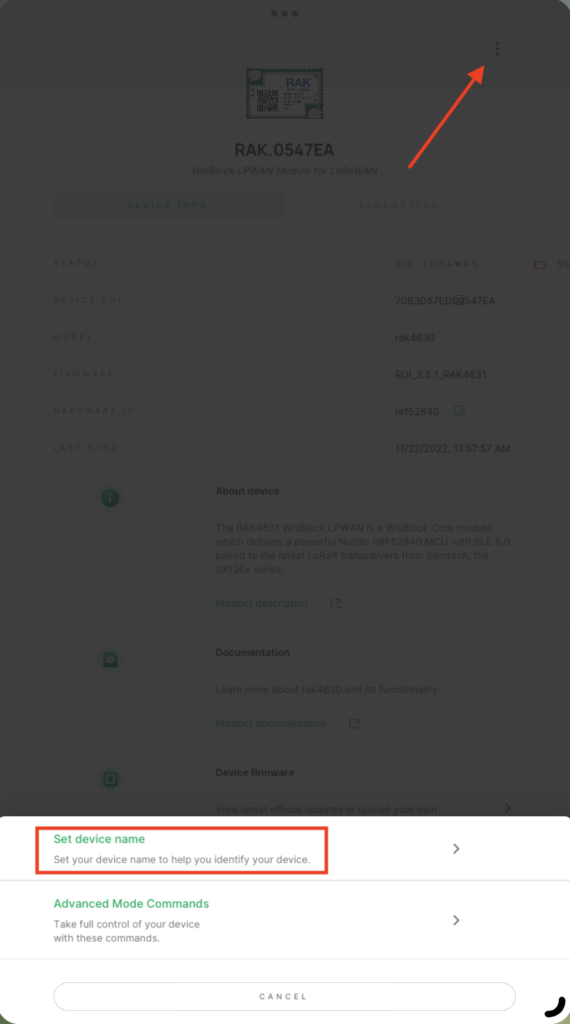
3) Enter a device name, mindful to the following constraints – allowed symbols are a-z, A-Z, 0-9, and the underscore “_”. Device name is limited to 16 characters.
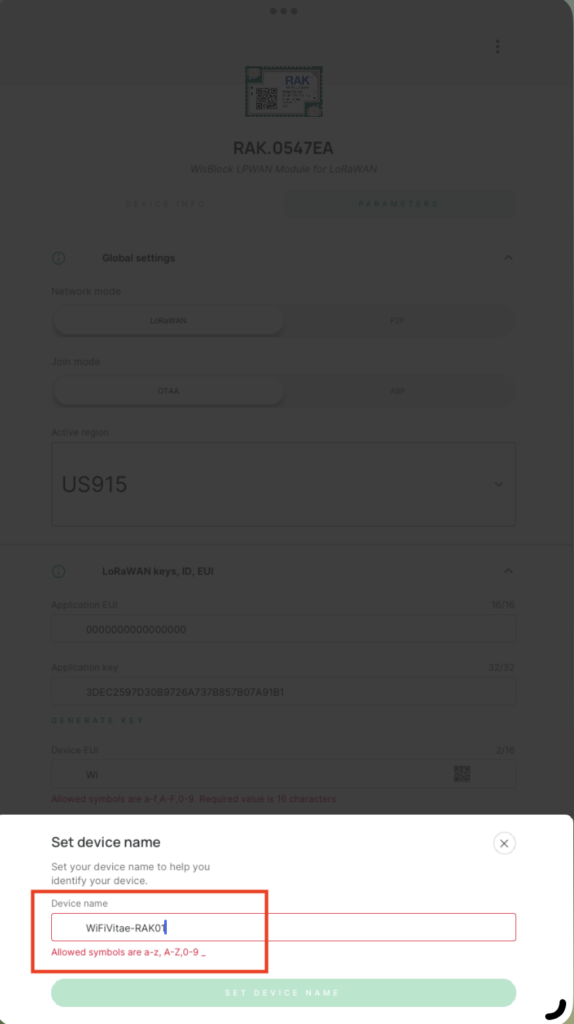
4) When complete and a valid name has been entered, click on the “SET DEVICE NAME” button.
Templates
You can optionally create templates allowing you to quickly change your device configuration from one application server to another.
You can save the LoRa parameters used in your application in a template and create multiple templates for different projects and applications. Additionally, if you sign in using a RAK ID, the templates are stored in the cloud.
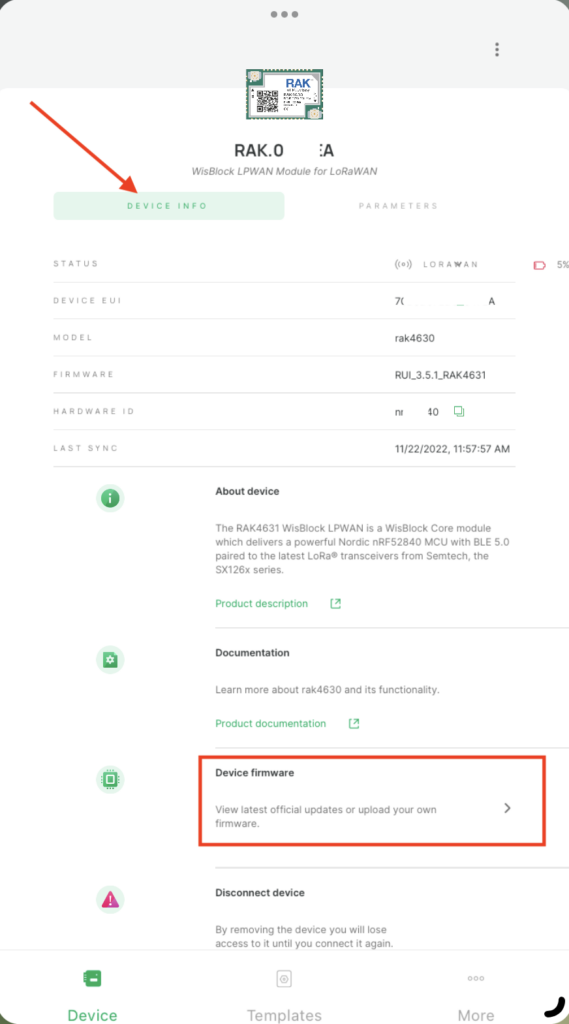
Updating Firmware
Periodically the firmware on your RAKWireless 10701-H will require a firmware update. This can be easily accomplished by following the steps below:
1) From the DEVICE INFO menu, click the Device firmware button, as shown below.
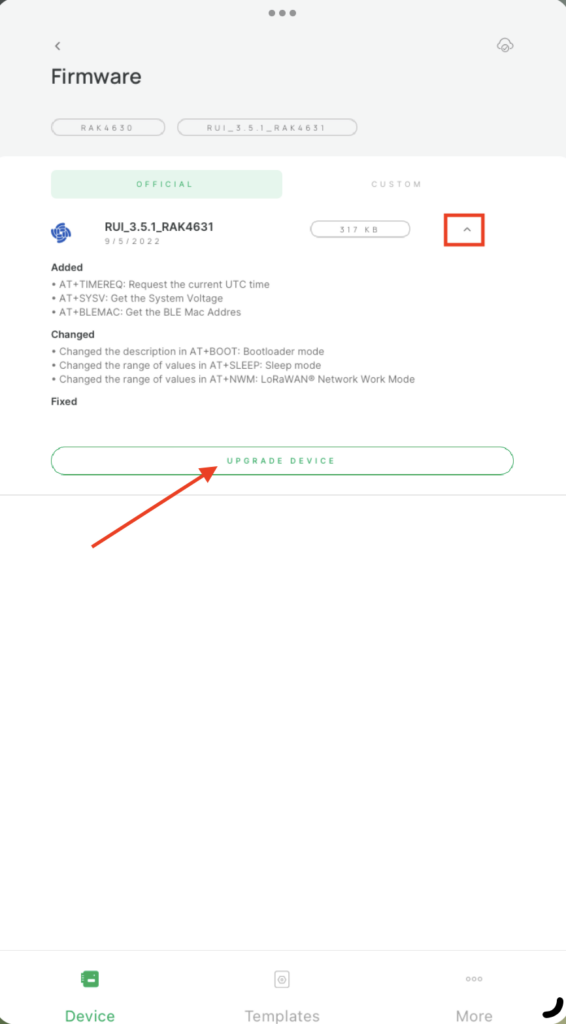
2) Expand the Firmware Description to view firmware details by clicking on the down arrow. Then click on the UPDATE DEVICE button to flash the newer version.
In part 4 – LoRaWAN Mapper – using Helium Console, we’ll see how add the RAK10701 to the Helium console and display tracking information.
Slàinte!
Resources
Official WisToolBox for Mobile Installation Instructions
Official WisToolBox for Desktop Installation Instructions