LoRaWAN Mapper – using Helium Console
This blog is part 4 of a 4-part series on LoRaWAN field mappers. For related information checkout the following posts:
LoRaWAN Mapper – using WisToolBox (iOS)
LoRaWAN Mapper – using Helium Console
Overview
This blog explains how to configure the Helium console to connect to a RAK10701-H field mapper and receive messages sent by the field mapper.
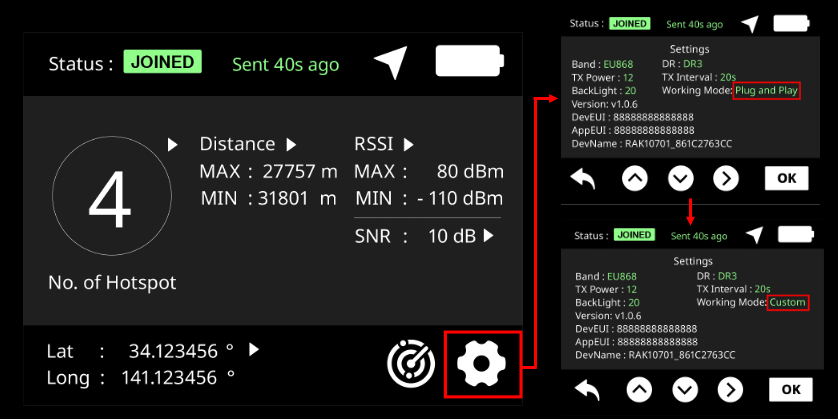
You can switch between modes when configuring the RAK10701-H settings menu and toggling the ‘Working Mode’ field, as shown below:
- Plug and Play Mode = Default connection to Helium
- Custom Mode = Connect to personal public/private Network/Application Server
Integrating Mapper (RAK10701-H) with Helium Console
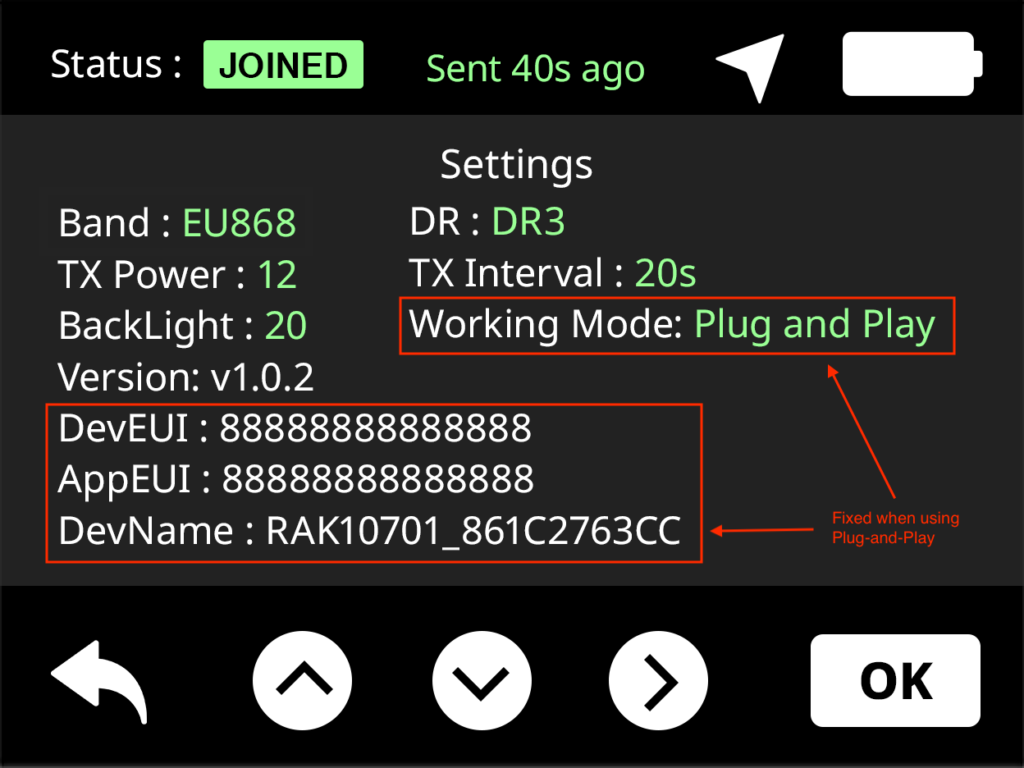
Plug and Play Mode
Plug-and-play mode automatically configures the RAK101701-H to work the following three applications allowing for quick real-time device testing requiring only the device name.
The DevEUI, AppEUI, AppKey, and DevName cannot be modified in this mode. Default device name (DevName) is visible in the settings menu.
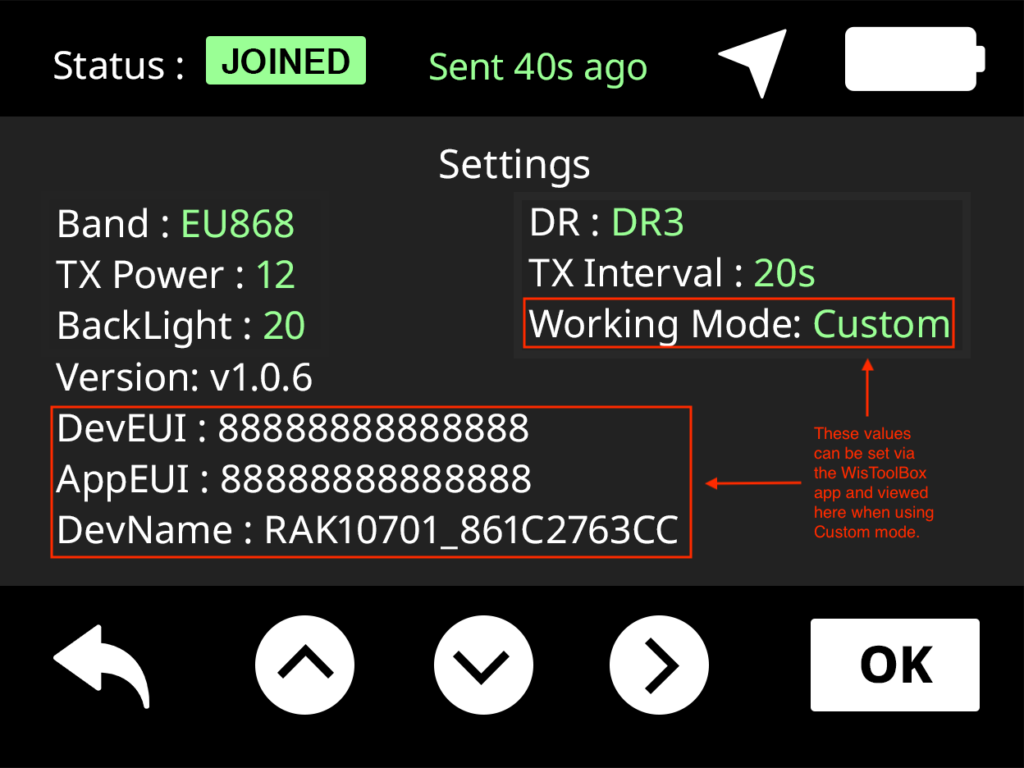
Custom Mode
Custom working mode configures the RAK101701-H to work with 3rd party LoRaWAN networks such as TheThingsNetwork or your own private LoRaWAN network.
The DevEUI, AppEUI, AppKey, and DevName are modified using the WisToolBox application and do not come into effect until the working mode is set to Custom.
Guide for Helium Network (Personal)
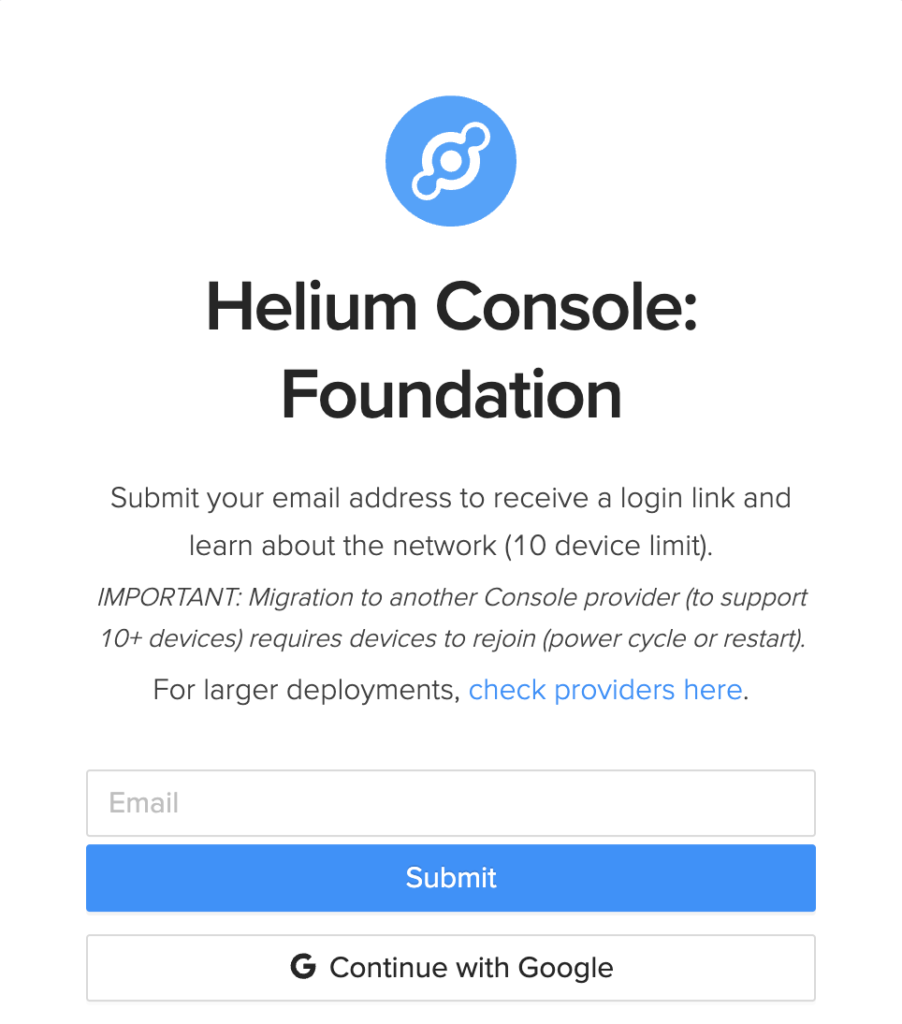
1) You need to register an account and then purchase data credits (DC) to use the network. If you are a new user, there are free data credits (DC) included in your new account to get you started quickly. Navigate to the Helium Console site: https://console.helium.com/.
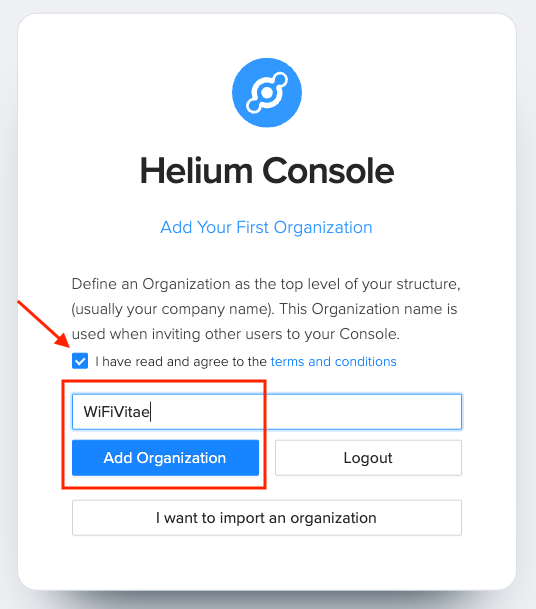
2) If you have not already done so, create an Organization.
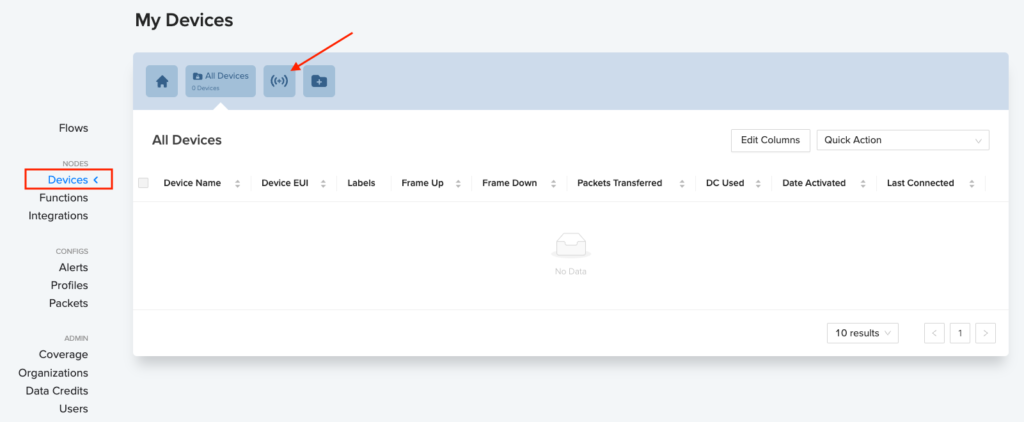
3) Next, add your device. Click on ‘Devices’ on the left-hand menu, then click ‘Add device’.
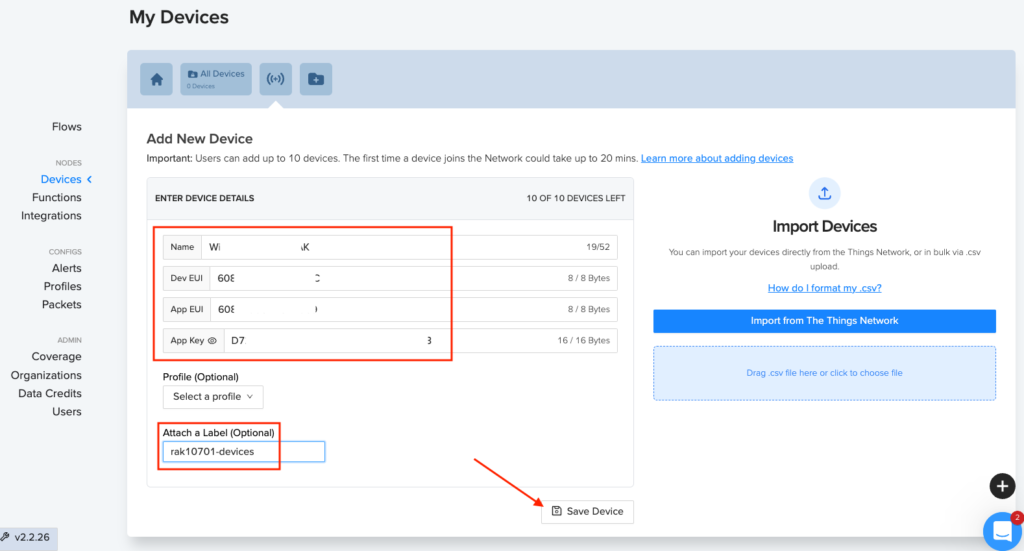
4) Enter the following device parameters to create your new device. DevEUI, AppEUI, and App Key must match the values configured on the Field Tester. After setting the desired the values, click on ‘Save’. Read how to set Key / EUI values on Field Mapper in Part 3: LoRaWAN Mapper – using WisToolBox (iOS)).
- Name: MyCoolRAKDevice
- DevEUI: (8-bytes) ) – e.g. 6081F9032B6B2010
- AppEUI: (8-bytes) – e.g. 6081F96DCB7CE89A
- App Key: (16-bytes) ) – e.g. D727C7710513EFF61E52596A557C7416
- Label: rak10701-devices (Required later to complete backend configuration)
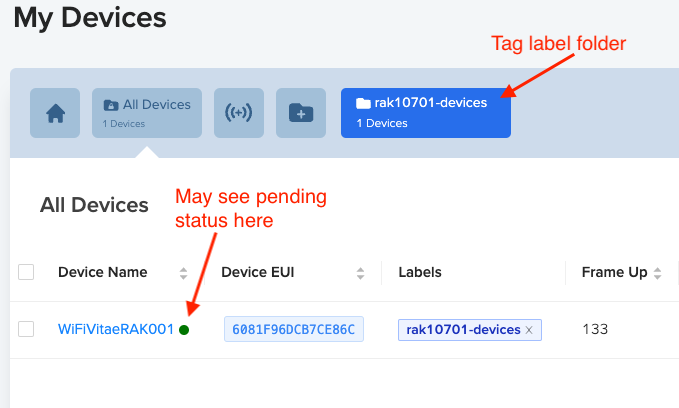
5) When returning to the ‘My Devices’ page, you will see your newly added device in a Pending state as it’s added to the blockchain.
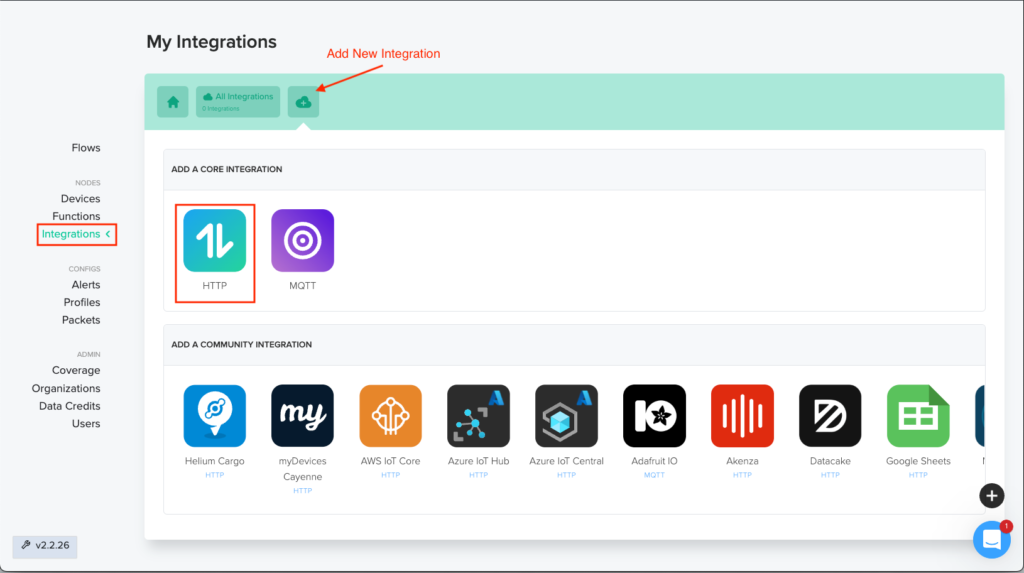
6) To receive packets, you must build the backend and create an Integration. Click on ‘Integrations’ then add an HTTP core integration.
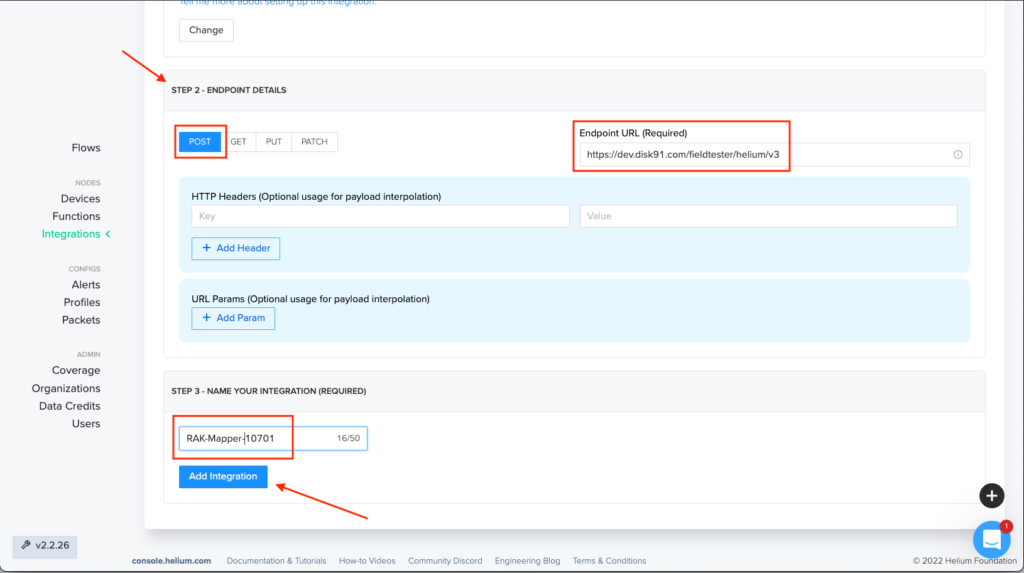
7) Scroll down on this page to Step 2. Select Post and enter the Endpoint URL: https://dev.disk91.com/fieldtester/helium/v3. Next, give your integration a name (i.e. RAK-Mapper-10701). Then click the ‘Add Integration’ button.
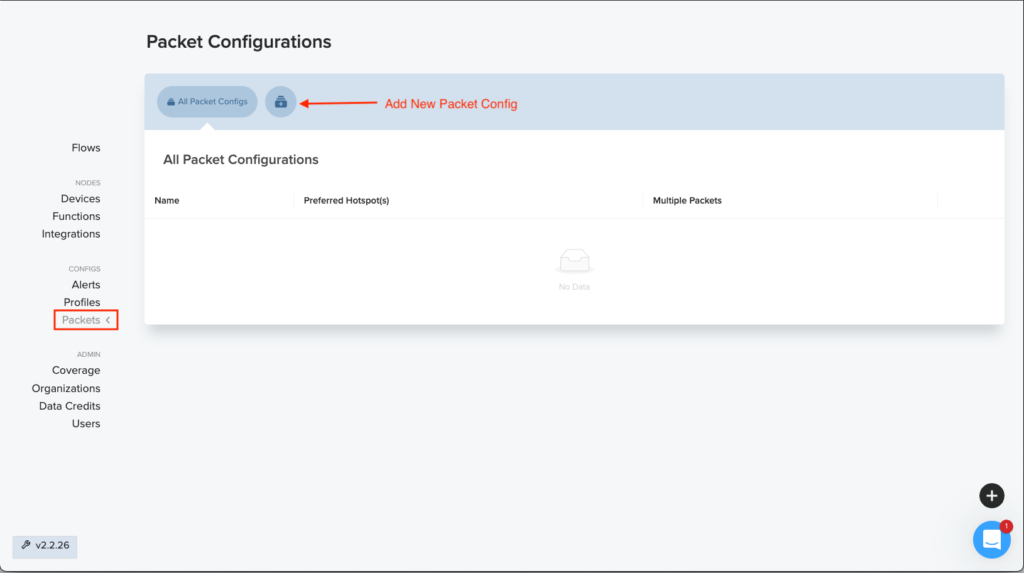
8) The next step is defining how to process incoming packets. Click on ‘Packets’, then ‘Add New Packet Configuration’.
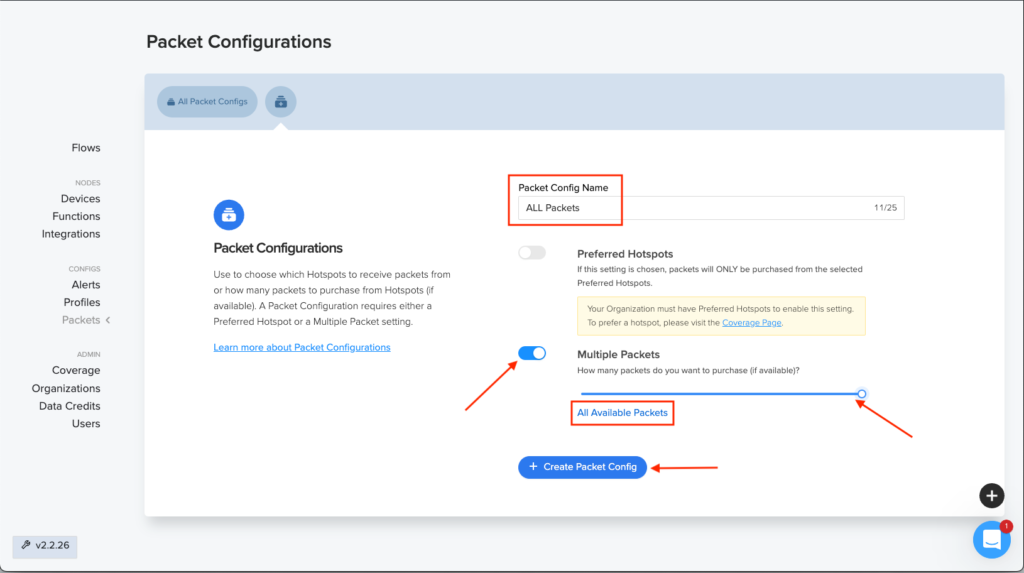
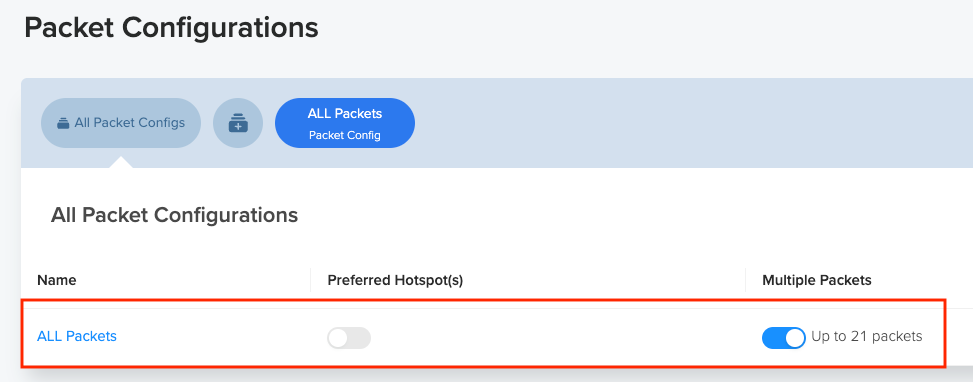
9) Give the Packet Config a Name (ALL Packets) and select Multiple Packets. Move the slider all the way to the right to set All Available Packets. Then click the ‘Create Available Packets’ button.
10) Returning to the Packet Configuration screen should display the recently created ALL Packets configuration.
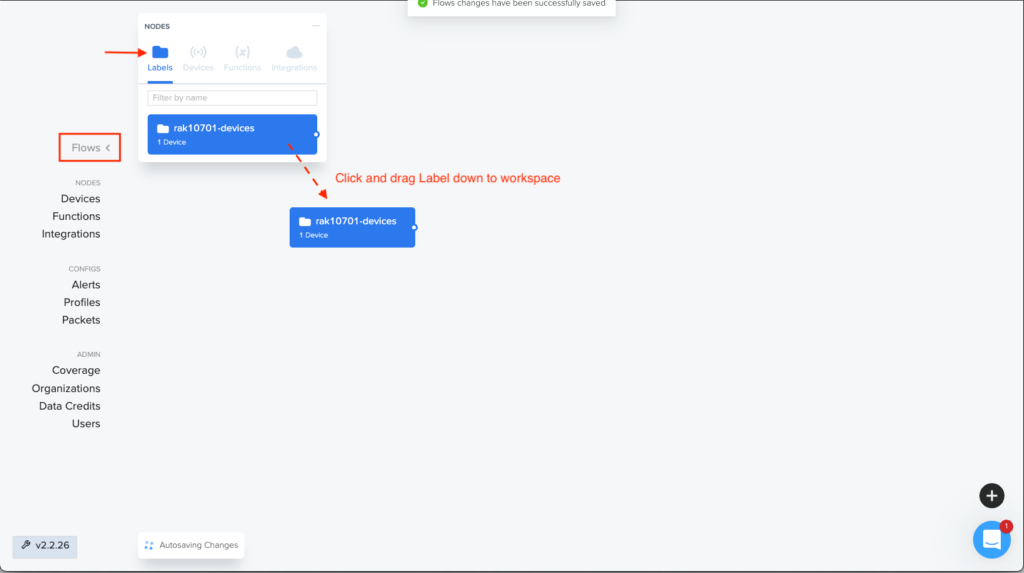
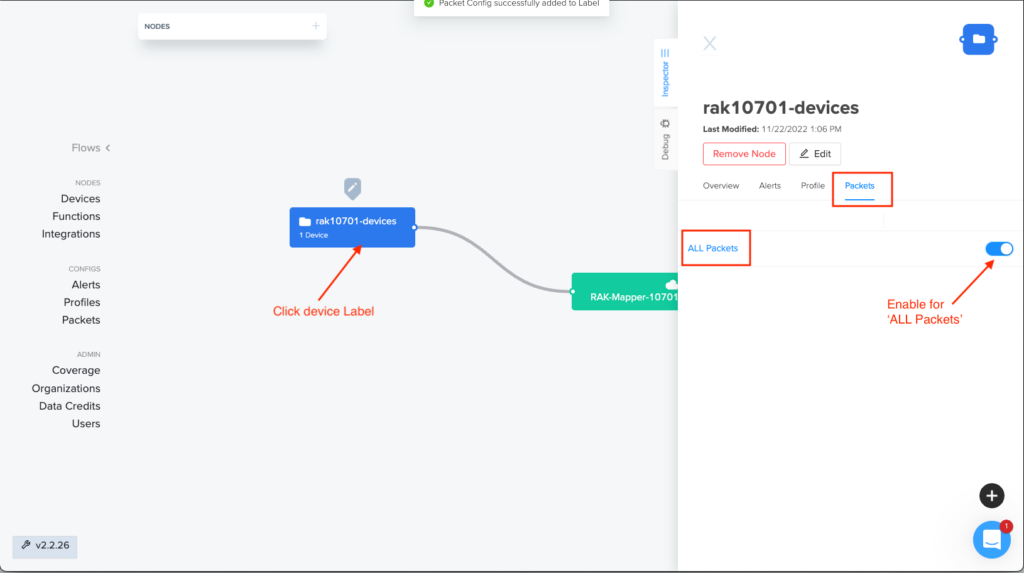
11) Next, a flow is required to connect the field mapper device with the integration. Click on ‘Flows’. Click the ‘Labels’ button, then click and drag the selected Label (rak10701-devices) onto the working area as shown.
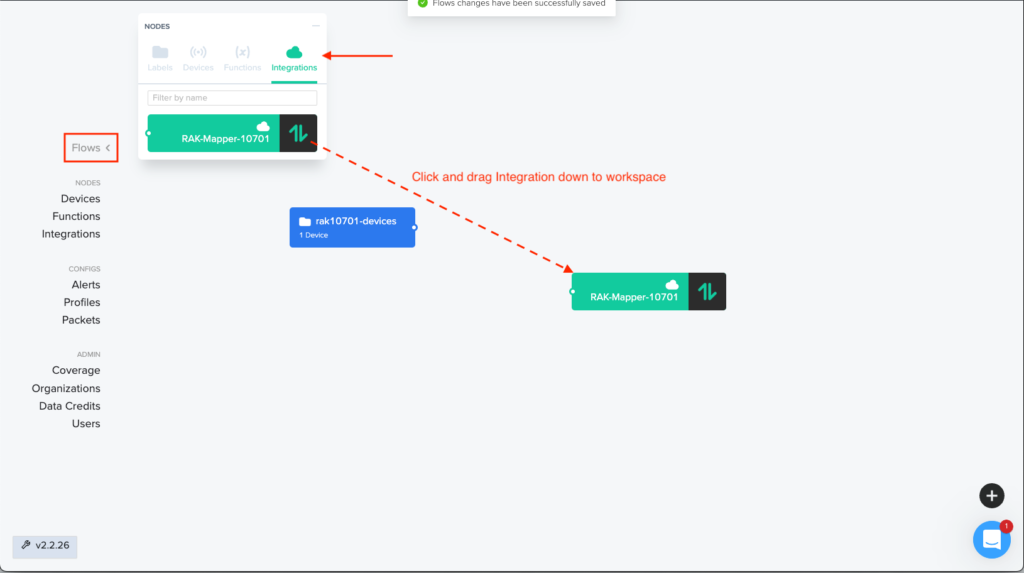
12) Next, click the ‘Integrations’ button, then click and drag the selected Integration onto the working area as shown.
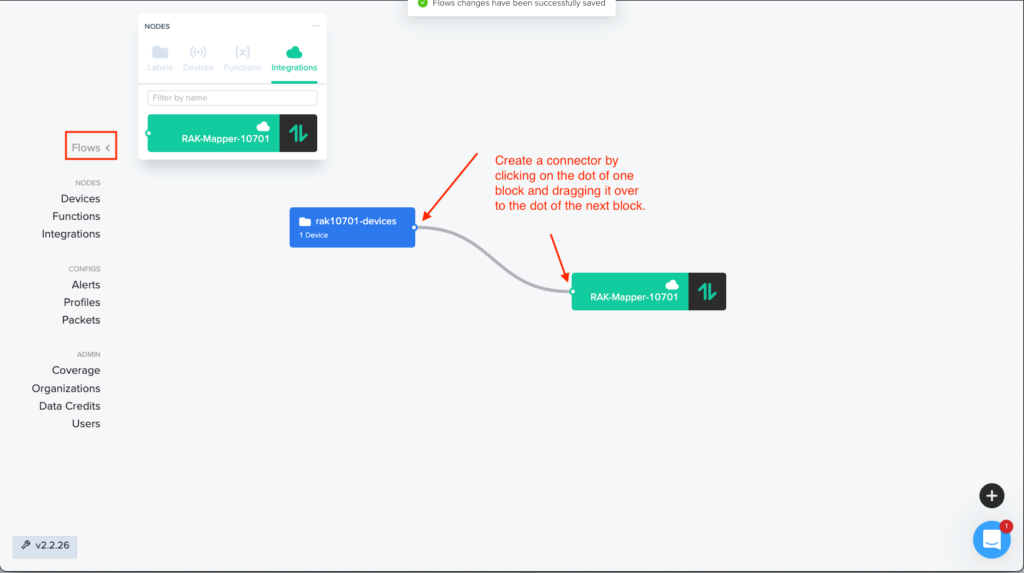
13) The next step is to connect the two blocks by clicking on one of the circles (blue Label block) and dragging the connector line to the other circle (green Integration block).
14) The final step is to associate Packets with the Devices Label. The field mapper device should already be listed as it has already been added to the rak10701-devices label. Click the ‘Packets’ tab and enable the ‘ALL Packets’ configuration.
Congratulations, the configuration is now complete. All that is required is turning on the field mapper, allowing it to Join, and then messages will start being received by the application.
Status of Relayed Packets
Clicking on devices > Device (WiFiVitaeRAK001) will display details about the field mapper with summary or received packets.

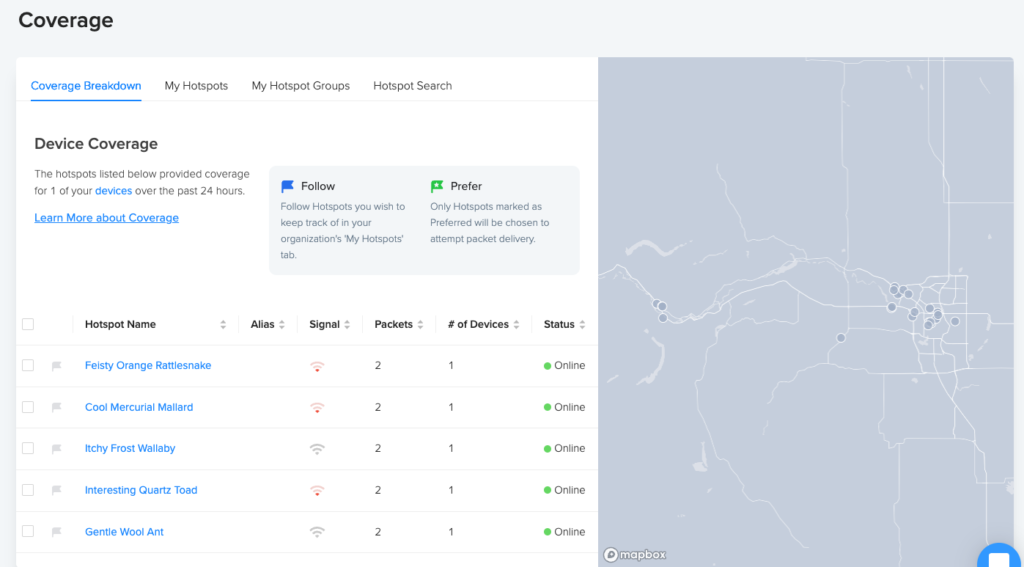
Clicking on Coverage will show a list of gateways and map locations where those gateways were detected.
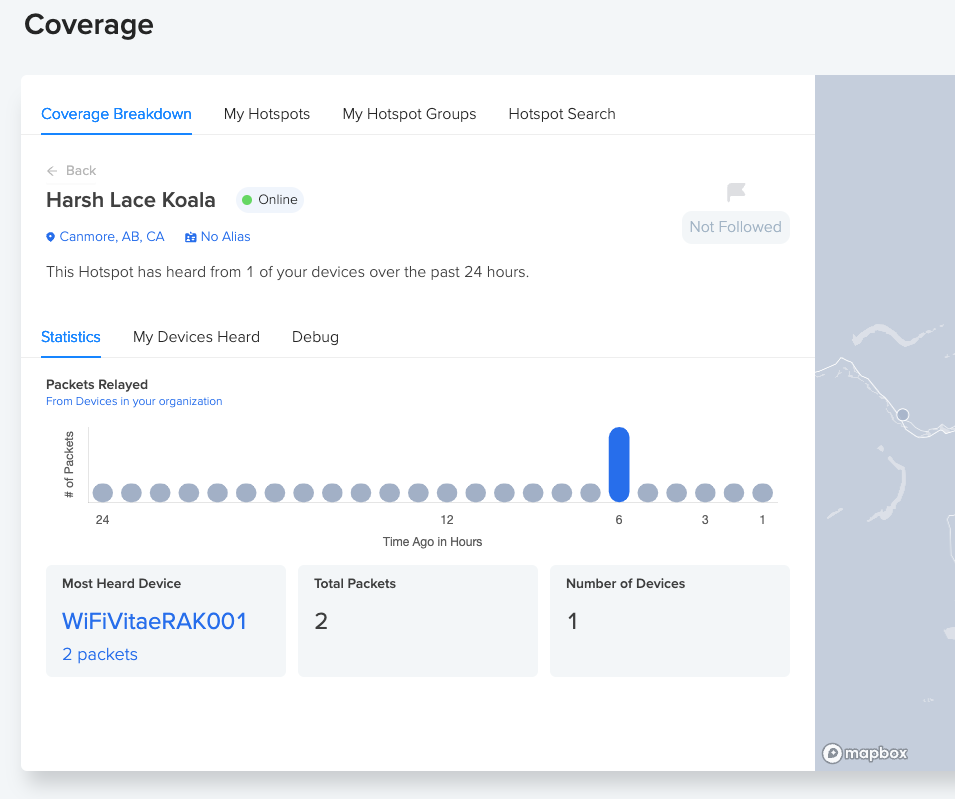
Clicking on the name of one of the gateways (ie. Harsh Lace Koala) will display details about packets relayed via that specific gateway.
Have fun mapping out the LoRaWAN Helium coverage in your area!
Slàinte!
Resources
Helium Console
RAK10701-H Field Mapper for Helium Quick Start Guide
https://docs.rakwireless.com/Product-Categories/WisNode/RAK10701-H/Quickstart
RAK10701-P Field Tested Pro for LoRaWAN Quick Start Guide
https://docs.rakwireless.com/Product-Categories/WisNode/RAK10701-P/Quickstart/